Another week of amateur radio has expired. Expired Ham, get it? 🙂
Welcome to another issue of Expired Ham, a weekly newsletter where I discuss the ways I participated in the amateur radio hobby this week.
I’ve started dabbling in a bit of carpentry this week. I immediately found myself having a bit of a problem after buying several Vibroplex bugs recently. I had no place to store them when not in use. I immediately started to think of a solution. I liked those carrying cases that some of the older bugs can be found with but I was unable to successfully locate enough of them so that all my bugs would have a home. So, naturally, being someone who enjoys working with their hands, I started to devise a solution of my own design. I started with the pen and paper design method and sketched a rough idea of what I had seen in my mind’s eye.
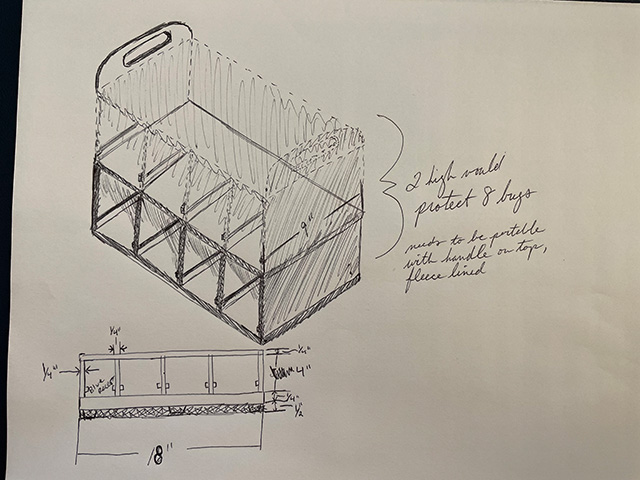
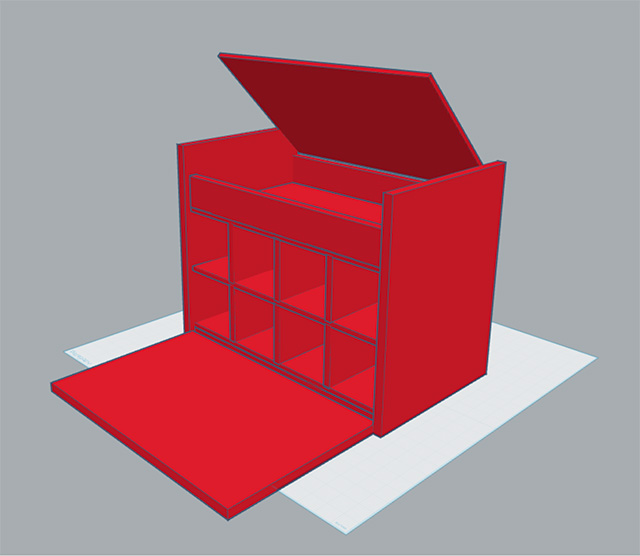
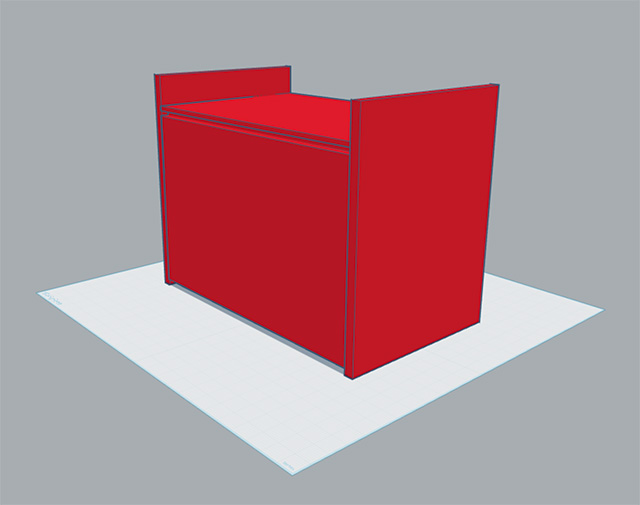
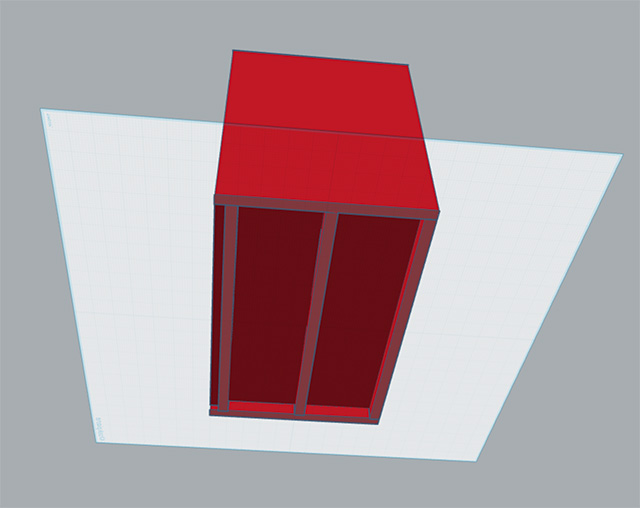
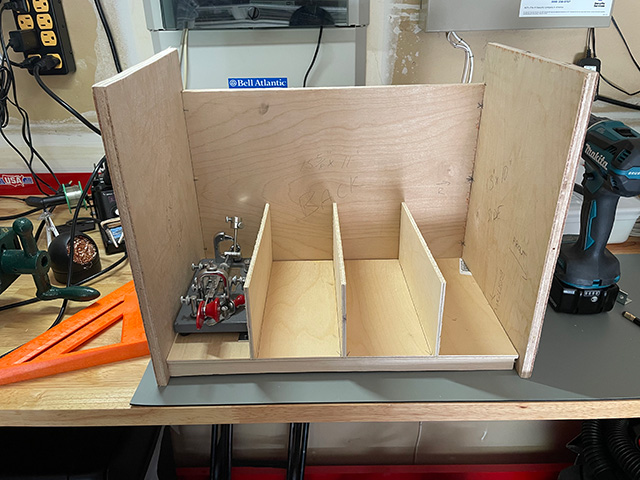
Content with the idea, I wanted to figure out what dimensions of all the parts would be and found that I could easily find this information using CAD software. I initially discovered FreeCAD, which I installed, but found to be a bit more advanced than I wanted to get into just yet (I may learn how to use it and leverage its more advanced features eventually) so I looked for an alternative with a flatter learning curve. I found TinkerCAD, which is a browser-based CAD-like design tool that seems to be designed for 3D printing projects, has a rather flat learning curve, and is free to use in its basic form with basic features. This was exactly what I needed and so I drew up my bug box design so that I could find the proper dimensions I’d need. If I had a 3D printer that was large enough, I could maybe have printed the entire box at this point, but I don’t have a 3D printer. Using the TinkerCAD software, I was able to determine my box needs to be roughly 16.625″ x 10″ x 13″ in size. It would have eight cubby holes for bugs and a storage drawer on the top with a lid. A door on hinges would be used to close up the front so the bugs don’t escape.
Swipe left or right to view the photos.
With the dimensions in hand, I then placed an order for some plywood and cutting tools. It’s been a while since I’ve used power tools and I don’t exactly have the best setup for carpentry work, nor the safest, I guess. With that being said, I think I did an acceptable job at cutting straight lines and I can proudly say that the majority of my wood pieces ended up somewhat close to the correct dimensions. The wife even got irritated at me for getting wood dust all over the garage. Nothing the Shop-VAC can’t handle though.
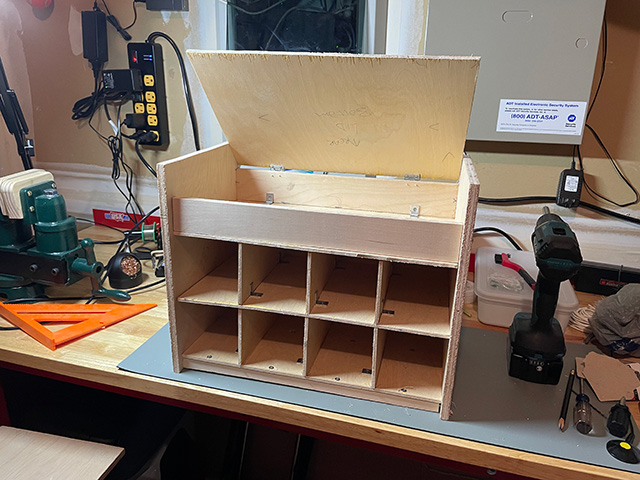
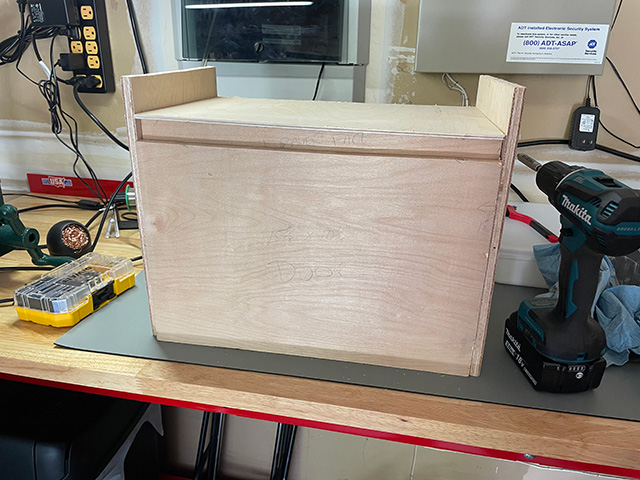
I need to make some adjustments so that I can fit the door on properly. As mentioned, some of my cuts were not exact so some of the parts didn’t line up perfectly. Luckily, I think everything is going to accept some tweaking quite well and the final form of K2MAS’s Bug Box will eventually be quite nice from a distance. I plan on sanding down the sharper edges sometime soon and am now on the hunt for some sort of comfy material to line the cubbies with and a somewhat durable material to line the outside of the box with, which will hide my carpentry skills a bit as well as help to prevent splinters. I will also add handles at some point to the sides. I’m on the fence whether I want to cut them into the tops of the sides like I had in my pen and paper drawing or if I just want to simply fasten a couple handles around mid-side and call it done.
If anyone wants the final measurements so that they can try building a similar box, here they are.
Sides: 1/2″ plywood – 2 pcs. – 10″ x 13″ (W x H)
Feet: 1/2″ plywood – 2 pcs. – 15-5/8″ x 3/4″ (W x H)
Back: 1/2″ plywood – 1 pc. – 15-5/8″ x 11″ (W x H)
Door: 1/2″ plywood – 1 pc. – 15-5/8″ x 10-1/4″ (W x H)
Drawer face: 1/2″ plywood – 1 pc. – 15-5/8″ x 2″ (W x H)
Lid: 1/4″ plywood – 1 pc. – 15-5/8″ x 10 (W x D)
Shelves: 1/4″ plywood – 3 pcs. – 15-5/8″ x 9″ (W x D)
Dividers: 1/4″ plywood – 6 pcs. – 3-3/4″ x 9″ (W x H)
For fasteners, I used #4 x 1/4″ stainless flat-top screws and L-brackets to secure the shelf dividers, drawer face, and in other places to provide some strength and stability. To fasten the sides to the back and the feet, I used 1″ pan-head screws that I bought years ago at IKEA and have finally found a use for.
Door and lid hinges were found at Lowe’s and are simple 1″ hinges.
So, do any of you have any experience with woodworking or carpentry? I’ve done a bit of spoon carving and other small-scale hand carving work, but this is actually my first bit of carpentry. I’ve definitely not good at it, but it seems like it could be a fun hobby to get into.
Best 73s,
Matthew, K2MAS
As a member of Amazon’s Associate program, I earn a small commission on qualifying purchases made through referrals. This helps offset the costs of hosting this website and are greatly appreciated.
