
If you’ve followed along with any of my prior posts, you’ll be aware that I recently acquired an Elecraft KX3 transceiver and some accessories. I love the radio and it works well with SSB and CW modes, but I wanted to also give myself the ability to work HF digital as well. I did my online research for a few days and found a lot of other hams using a SignaLink or some other form of external sound card and various cables to connect their radio to their computer. I want simple and easy and small, so those options I came across did not work out for me. I did find the solution to my problem, though, in the form of a Digirig Mobile and the appropriate cabling for connecting to the KX3. I have a Digirig DR-891 for my FT-891 radio and it has always been a flawless piece of radio kit. I expected the same in this case as well and sure enough, that’s what I received.
In this post, I’ll document the items I am using, the process of connecting it all together, and lastly, how to configure the WSJT-X settings to get your signal on the air and to decode other hams’ signals. Follow along if that’s something you’d like to get figured out yourself.
Kit Components:
- Apple MacBook Pro M2 16″
- Digirig Mobile (RS-232 levels)
- Digirig Elecraft KX cables set (combined, short)
- Digirig Short USB-C to USB-C cable
- Elecraft KX3 Transceiver
- WSJT-X software
Connecting everything together
The Digirig Elecraft KX combined, short cables set provides you with three 90º TRS connectors on the transceiver side and two TRRS connectors on the Digirig side. The TRS side has a connector for PTT, Audio, and CAT control. On the Digirig end of the cables set, there are connectors for serial and audio.
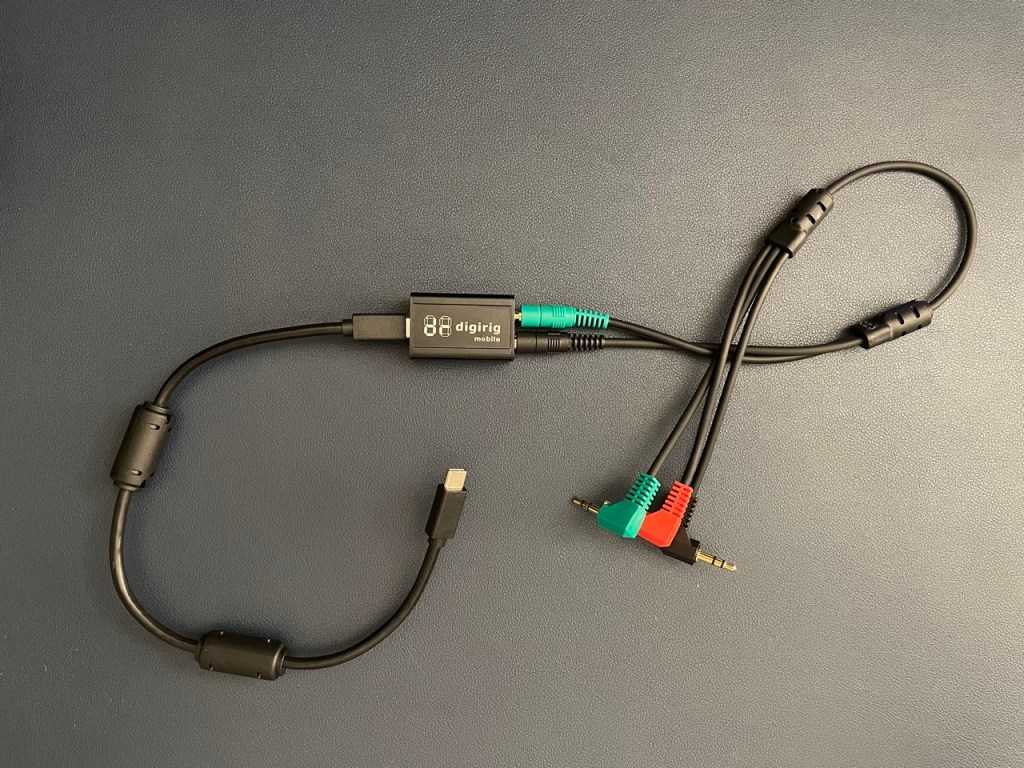
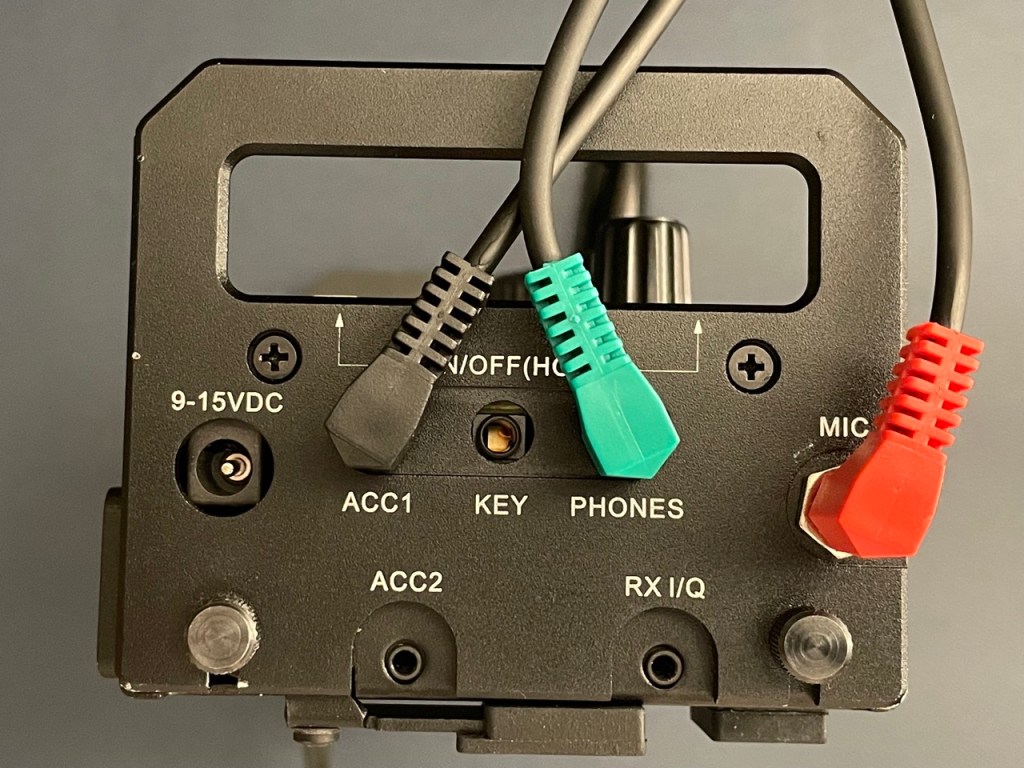
- Connect the PTT (red) TRS connector to the KX3’s MIC jack.
- Connect the Audio (green) TRS connector to the KX3’s PHONES jack.
- Connect the CAT (black) TRS connector to the KX3’s ACC1 jack.
On the other end, connect the serial (green) TRRS connector to the Digirig’s serial jack and connect the audio (black) TRRS connector to the Digirig’s audio jack.

If you want to make your own connection cable, Digirig provides this schematic showing how to do so.
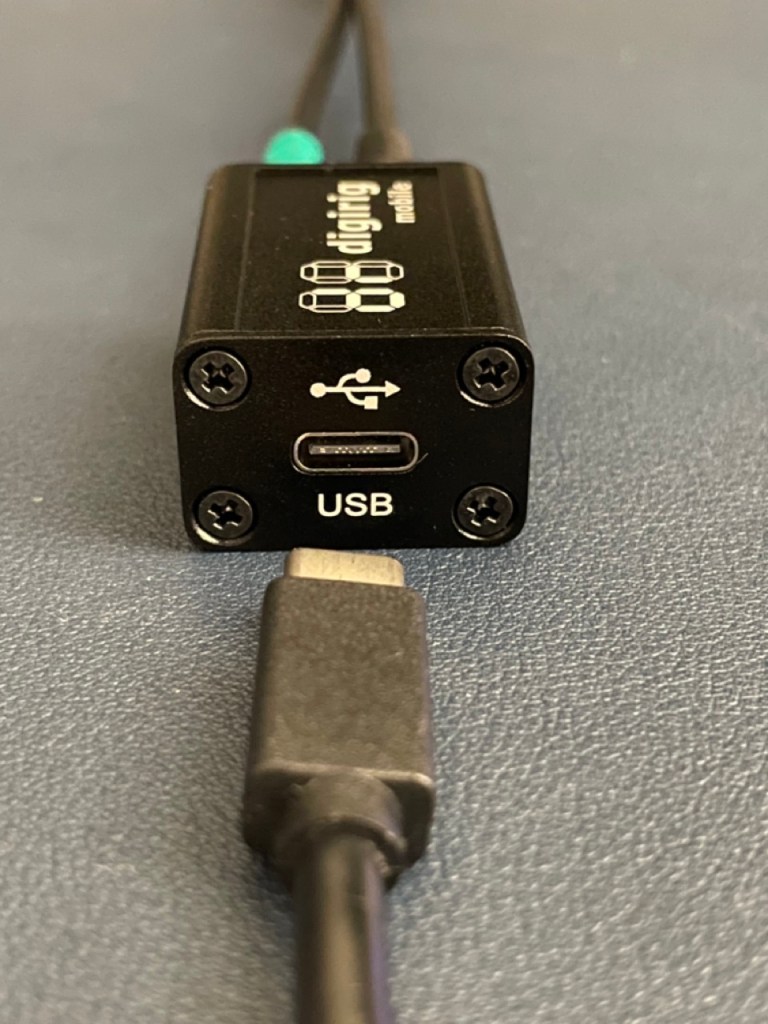
The connection between the Digirig Mobile and your computer is over a USB-C cable. Since my MacBook Pro has several USB-C ports, I used the short USB-C to USB-C cable from Digirig which comes with two preinstalled ferrite chokes. I used this cable because I already had it. Use whatever cable facilitates the connection from the USB-C port on the Digirig to a USB port on your computer.
Messing around with the software settings
You’re on your own with installing any prerequisite software on your computer needed to use the Digirig Mobile and WSJT-X. There is a driver you that may possibly need to install for the Digirig to be recognized by your computer. The details surrounding that can be found on the Digirig website. Make sure your computer is able to recognize the Digirig according to the setup instructions and troubleshooting documentation on the Digirig website before you continue.
Once you have the KX3, Digirig Mobile, and computer connected, power on the KX3. Press the DATA mode button to enter data mode. Press the DATA button a second time to make sure you are in DATA A mode and that the sideband in use is shown as USB. Widen your bandpass width to 2.8 kHz or higher. I set mine to 3.0 kHz. This ensures that you’ll be able to see the entire sideband in WSJT-X. Also, get into the Menu by giving the DISP button a long-press and use the OFS knob to navigate to AFX MD (Audio Effects Mode) and set this value to OFF. Turn the OFS knob to the next menu option which should be AGC MD (Automatic Gain Control Mode) and set this value to OFF. Setting AGC MD to off allows you to manually adjust gain levels which will be useful later when tuning WSJT-X.
Heading over to the computer, launch WSJT-X. Then go to the WSJT-X settings and select the Audio tab. Here, you’ll select the appropriate Input and Output audio devices that are presented by your Elecraft KX3 transceiver. In my case, on macOS, using the Digirig Mobile, my Input and Output devices are both set to “USB Audio Device”. I set the input channel to Mono and the Output channel to Left.
Move on over to the Radio tab and here you’ll configure the CAT control and PTT settings for the Elecraft KX3. Begin by selecting the following options. These may differ for you depending on your operating system and mode of connecting the KX3 to your computer.
- Rig = Elecraft KX3
- Serial Port = /dev/tty.usbserial-110
- Baud Rate = 38400
- Data Bits = Eight
- Stop Bits = One
- Handshake = None
- PTT Method = RTS
- PTT Method Port = /dev/tty.usbserial-110
- Mode = Data/Pkt
- Split Operation = None
Once you have the settings configured, test them by clicking the Test CAT button. If all is as it should be, the Test CAT button will turn green. If you’ve gotten this far successfully, go ahead and click the Test PTT button as well which will indicate whether your sound devices configuration is accurate. When you click the Test PTT button, it will turn red and you’ll see the TX LED on the KX3 illuminate. Click the Test PTT button again to stop the test. If all tests are passed successfully, click OK on the Settings window to save your configuration. Follow the WSJT-X documentation if you need to set up the rest of the application. Once you have saved your WSJT-X settings. You should begin seeing signals in the WSJT-X waterfall as well as begin to see decoded signals in the Band Activity window.
Now we can adjust some more of the settings on the KX3 to finish things up before hitting the Enable Tx button on WSJT-X. First, is to set your AF/RF so that the receive level in WSJT-X is in the green. The recommended level is around 30dB but this must be for environments with a low noise floor as the lowest I can go and still have a usable product is around 60dB. The bottom line is that you want to make sure your receive level meter stays green. If everything looks alright at this point, go back into WSJT-X and click on the Tune button. This sends a tuning signal to your radio so that you can adjust the Pwr slider to keep ALC values within boundaries and ensure the cleanest signal being transmitted. Don’t keep that Tune button activated for too long and you’d do yourself a favor by keeping your transmit power on the KX3 low during the test just to play it safe.
On the KX3, during the WSJT-X tuning process, you can short-press the KEYER/MIC knob to switch the meters from CMP/ALC and SWR/RF. We want to see SWR, RF, and ALC in particular. Start with the SWR/RF meters in view. When you click the Tune button in WSJT-X, you should see the RF meter indicate your transmit power along the scale. You should also see the SWR reading of your antenna system. As you’d expect, keep the SWR level as close to a 1 to 1 match as you can get it for best experience. Switch over to the CMP/ALC meter by giving the KEYER/MIC knob a short-press and take note of the ALC level. ALC levels should stay within the indicated range on the meter. Adjust the Pwr slider in the WSJT-X application to make that happen. Note that if you have the Pwr slider all the way to the top and you don’t see any deflection on the ALC meter, adjust the Pwr slider lower until you do see a meter reading. Then adjust the Pwr slider so that you have your ALC meter reading within acceptable range. The objective is to have an acceptable amount of ALC while retaining maximum power output as set on the KX3 power setting.

Once you have your Elecraft KX3 tuned up and within all the acceptable settings, go ahead and click that Enable Tx button in WSJT-X and start having some fun.
Troubleshooting
- If you’re able to decode digital messages in WSJT-X, but you’re not being heard by other operators, systematically start checking things from the antenna back to the transceiver. Check the SWR of your antenna with an analyzer to make sure you’re seeing a 2:1 or better SWR on your operating frequency. High SWR for an antenna system will likely cause your transceiver to automatically lower transmit power to avoid damage to the transceiver. Low power can mean that your signal isn’t reaching anyone who is able to pull it from the noise.
- If your antenna system SWR is within tolerance, but you’re still not able to answer someone’s CQ, send your own CQ message on repeat for a few minutes and see if you end up getting spotted on PSK Reporter. A great way to watch for that is to use HamAlert to trigger a notification when your callsign is spotted. If you do this and you find that you are indeed being spotted, pay mind to the signal report included with the spot. If the number is double-digits in the negative, then your signal was really weak at the spotter’s QTH. You could improve signal strength and range by relocating your antenna. (Side note: HamAlert is a great way to know when your favorite hams are on the air)
- You’ll do yourself a huge favor by reading the KX3 operating manual to learn the ins and outs of your radio.
Alright, I think that’s it for now. 73 to you all.
Matthew, K2MAS
K2MAS.net is not affiliated with any of the sites or products listed in this article. All opinions are the author’s own.
As a member of Amazon’s Associate program, I earn a small commission on qualifying purchases made through referrals. This helps offset the costs of hosting this website and are greatly appreciated.
